PDF Accessibility
Document Completion
After tagging a document for accessibility, further steps are needed to ensure it is fully accessible. This process, known as “finishing a document,” goes beyond adding structural tags—it verifies compliance with accessibility standards, ensuring the document is fully navigable for all users, including those with disabilities.
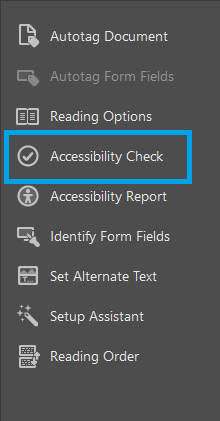
- Step 1 : Click on the ‘Accessibilty tool’
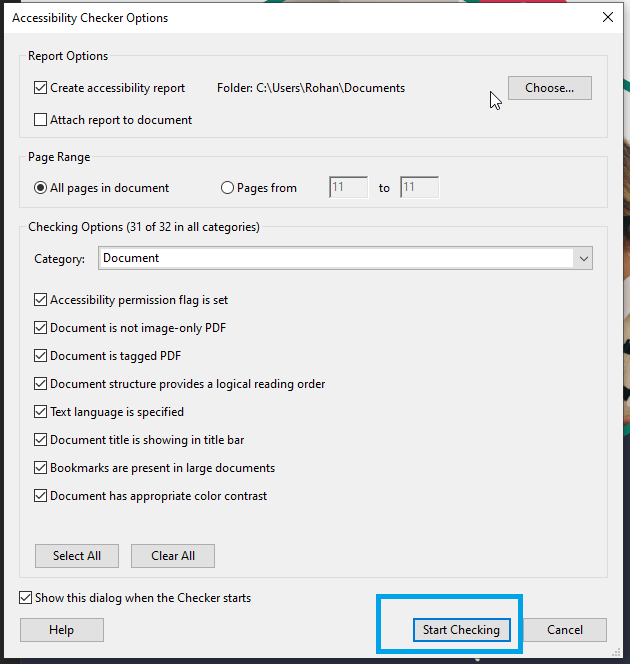
- Step 2 : Start checking
- Step 3 : Verify and solve issues
Note : Make sure each and every failures are fixed or passed.
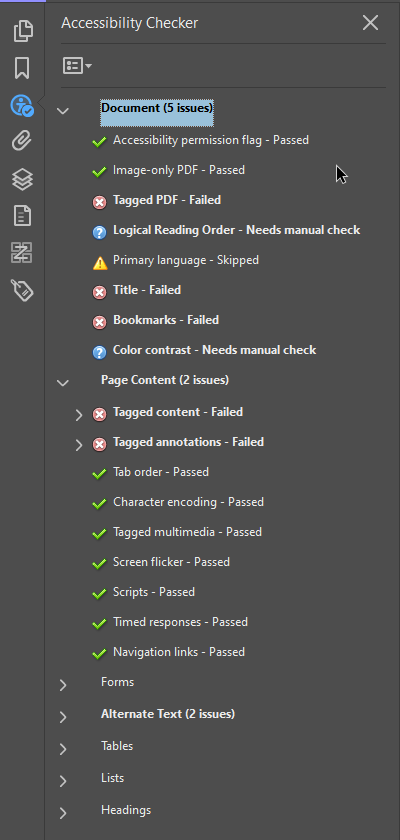
Common issues encountered in accessibilty checker :
- PDF not marked as ‘tagged’: Tag the PDF in the Tags panel to ensure it’s structured for accessibility and Mark it as “Tagged PDF”.
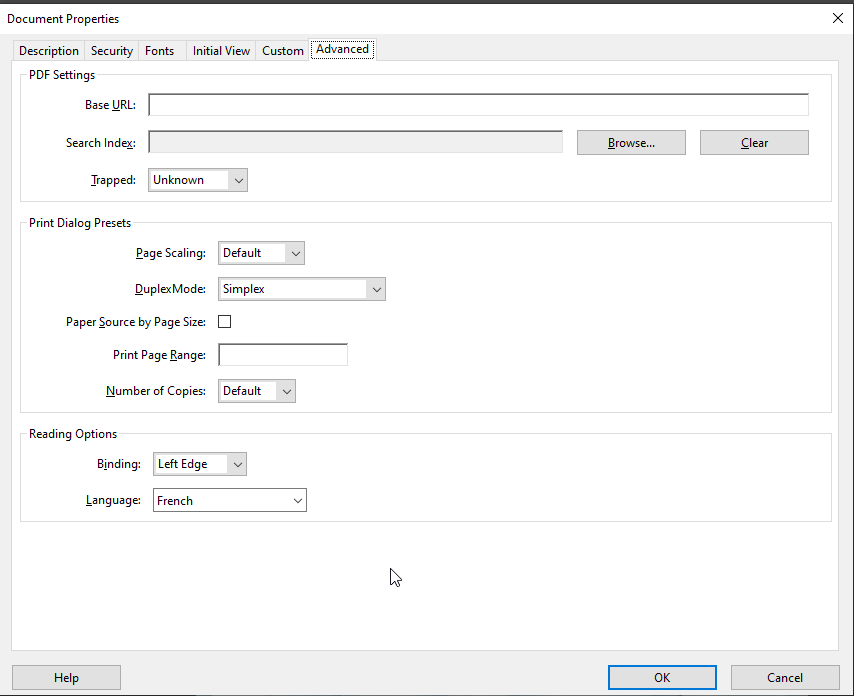
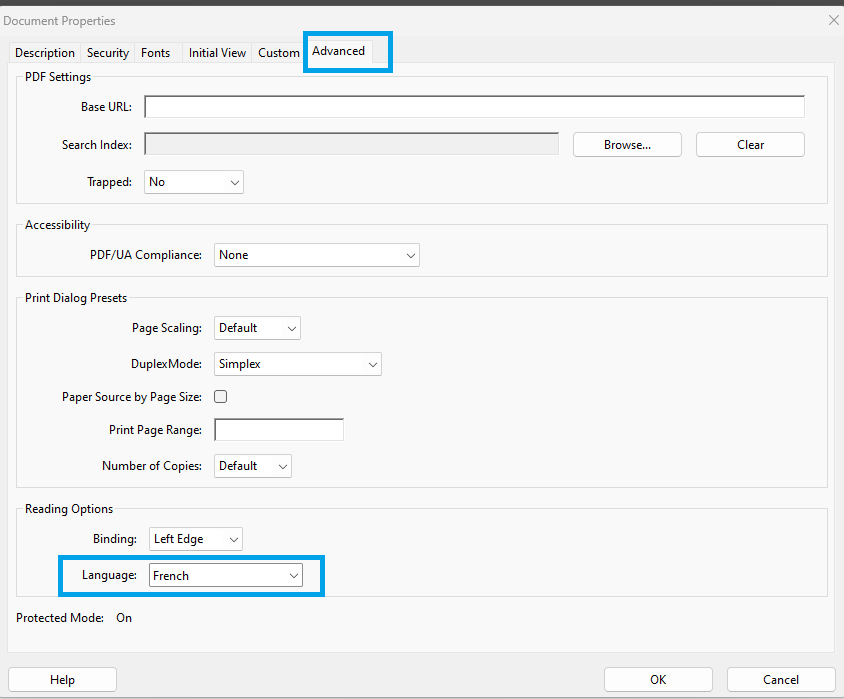
- Language not set: Set the document language in the “Document Properties” under the “Advanced” tab to ensure correct screen reader pronunciation.
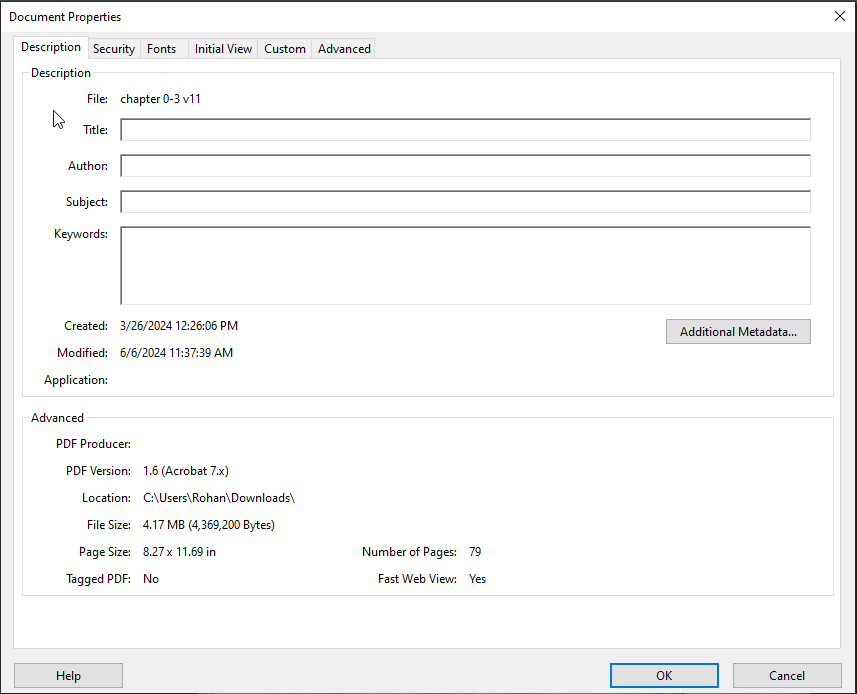
- No title present: Add a document title in the “Document Properties” under the “Description” tab to provide context for users.
- No bookmarks: Create bookmarks by using the “Bookmark” panel to organize the document for easier navigation.
- Tab order not structured: Adjust the tab order in the “Tags” panel or through the “TouchUp Reading Order” tool to ensure proper reading flow.
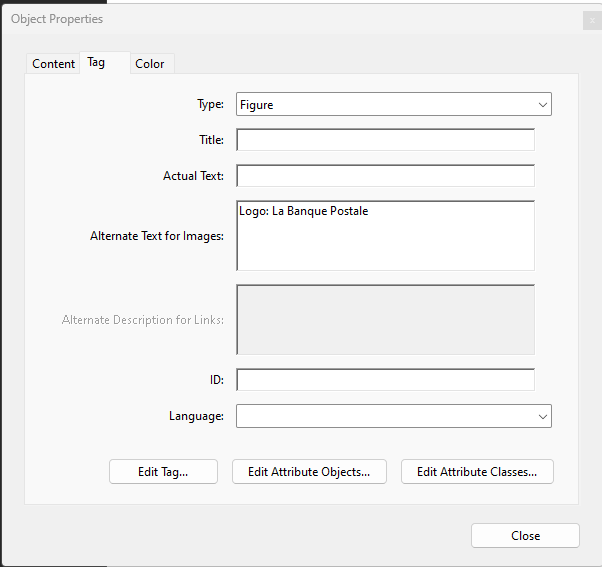
- Alternative text missing for links and figures: Add descriptive alt text to images and links via the Tags panel or the “Properties” dialog.
- Irregular tables (Rows and Header cells issues): Use the “Table Editor” to properly mark header rows and cells, ensuring proper table structure for screen readers.
- Issues regarding heading levels: Correctly apply heading tags (H1, H2, H3, etc.) using the Tags panel to establish a logical document structure for accessibility.
On this page
Using Document Properties (Ctrl + D)
Document properties are essential for ensuring accessibility and proper metadata management. By pressing Ctrl + D, you can:
- Set the document title (typically corresponding to the main heading, 'H1').
- Add the author's name for attribution and reference.
- Specify the document language to improve screen reader interpretation.
- Define custom properties for additional metadata as needed.
1) Language
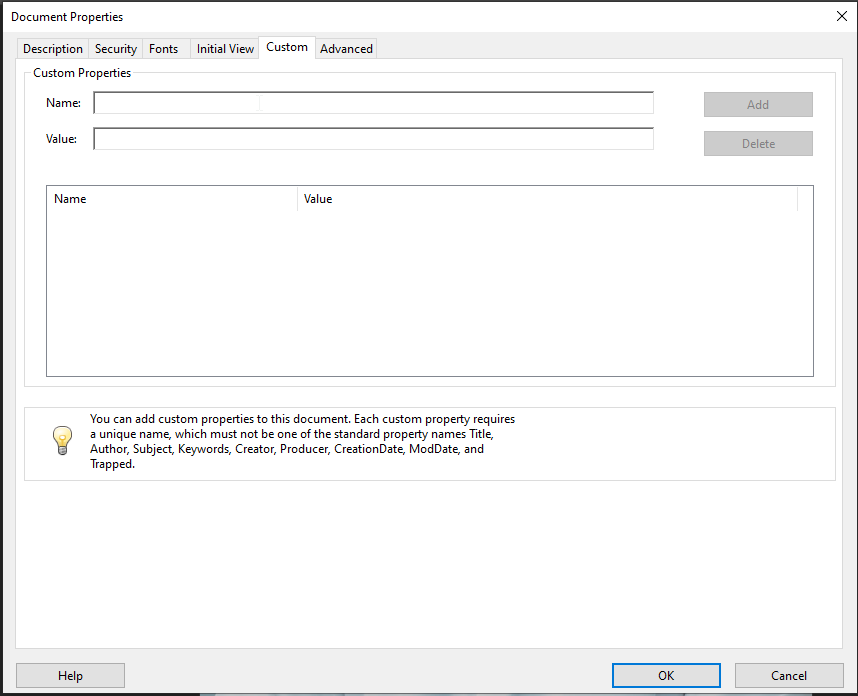
2) Custom Properties
| Language | Name | Value |
|---|---|---|
| French | Accessibilité | PDF conforme aux normes d'accessibilité PDF/UA (ISO 14289-1), balisage réalisé par Ipedis |
| English | Accessibility | PDF compliant with the PDF/UA (ISO 14289-1) accessibility standard, powered by Ipedis |
3) Title and author
4) Reading Properties
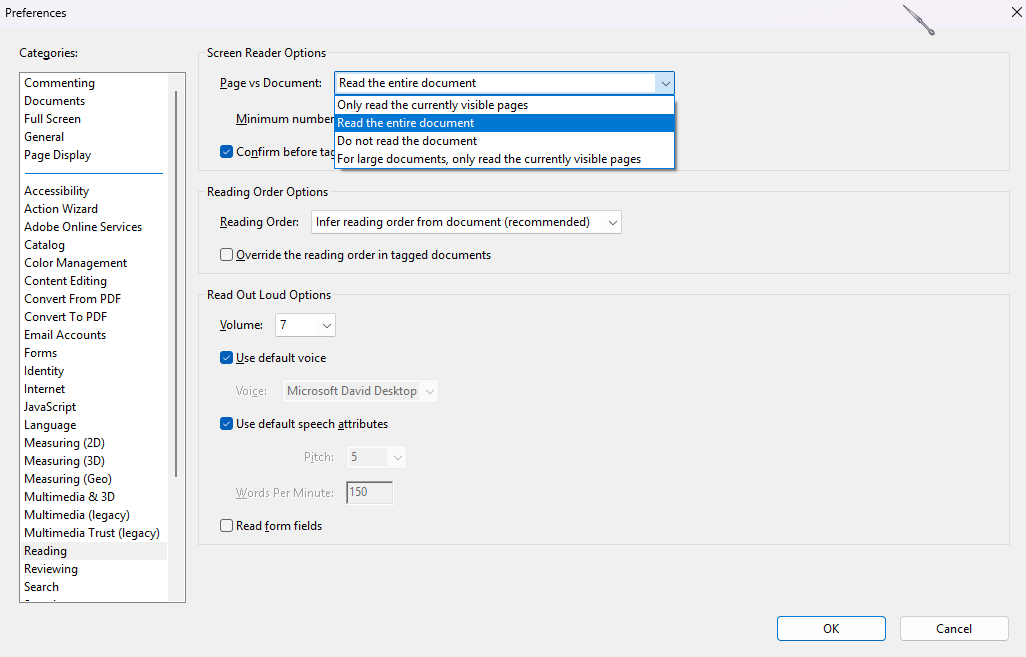
There are 2 options when it comes to reading the document via screen reader.
- Only read the currently visible pages :
This is the default setting because it provides the most practical and user-friendly experience for reading documents. It ensures that the document follows a logical, page-by-page structure, allowing users to navigate efficiently using keyboard shortcuts or navigation commands, depending on the screen reader they are using. Maintaining this standard navigation behavior supports accessibility best practices and allows all users—especially those relying on assistive technologies—to move through the document smoothly and predictably. - Read the entire document :
This option allows the document to be loaded in its entirety at once. While this approach can be effective for smaller documents (typically under 70 pages), it is not recommended for larger files. Loading a lengthy document all at once can significantly increase processing time—ranging anywhere from several minutes to over half an hour—and may temporarily freeze or slow down the user’s system. This results in a poor user experience and reduced accessibility performance. For this reason, this option should generally be avoided for large documents in favor of methods that load content progressively or by page.
- Step 1 : Open your PAC 2026
- Step 2 : Drag and drop your file onto the user interface or open document
- Step 3 : Open the ‘Results in detail’ to view and locate errors present in tagging structure/tags/contents..etc.
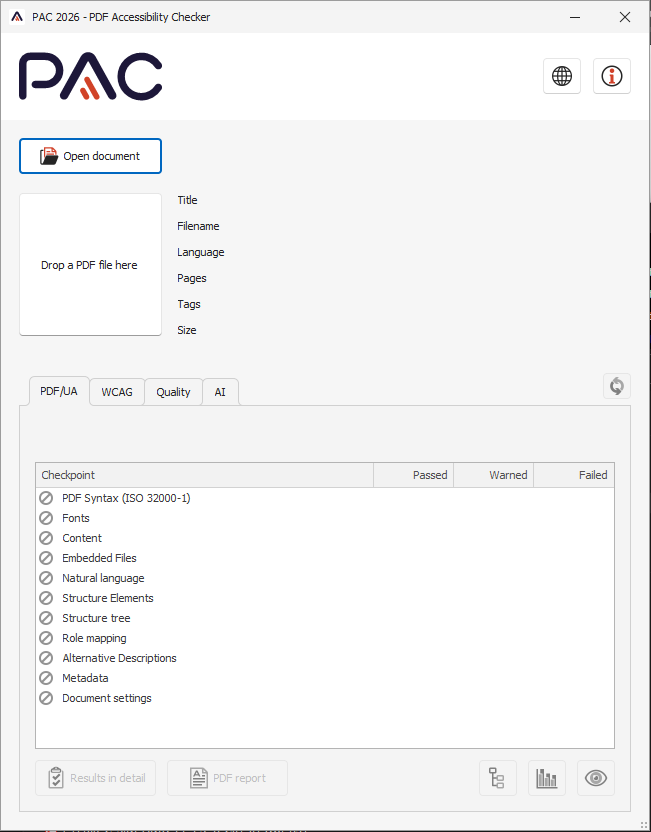
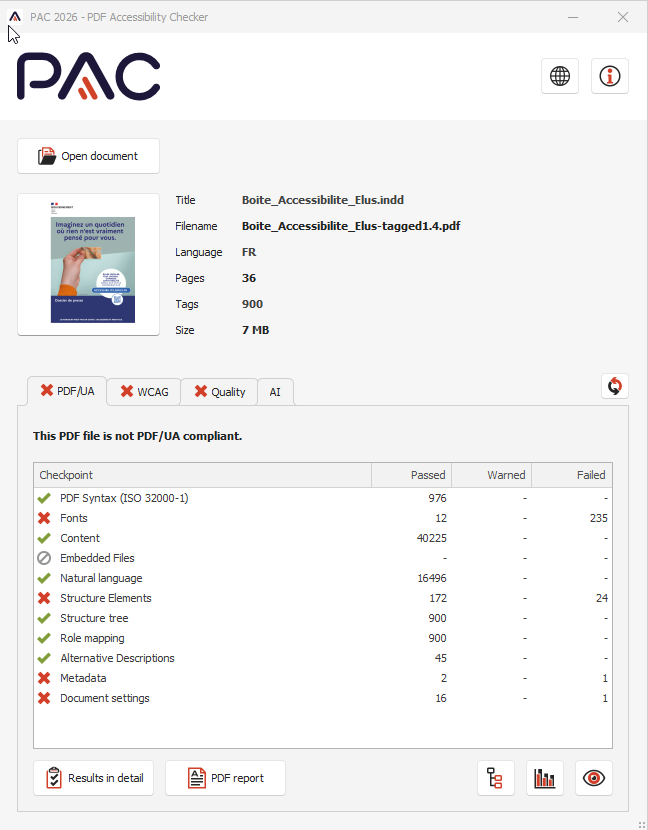
PAC 2026
PAC Report
Results in detail consist of :
- PDF syntax (Issues in tagging tree)
- Fonts
- Content
- Natural language
- Structure elements (Headings, Notes, Annotations, Figures and Table)
- Structure tree (Mostly figures, notes, annotations that require ‘Placement and Block’)
- Role mapping
- Alternative Descriptions (Links, figures and form fields)
- Metadata
- Document settings (Title, tagged document and tab order)
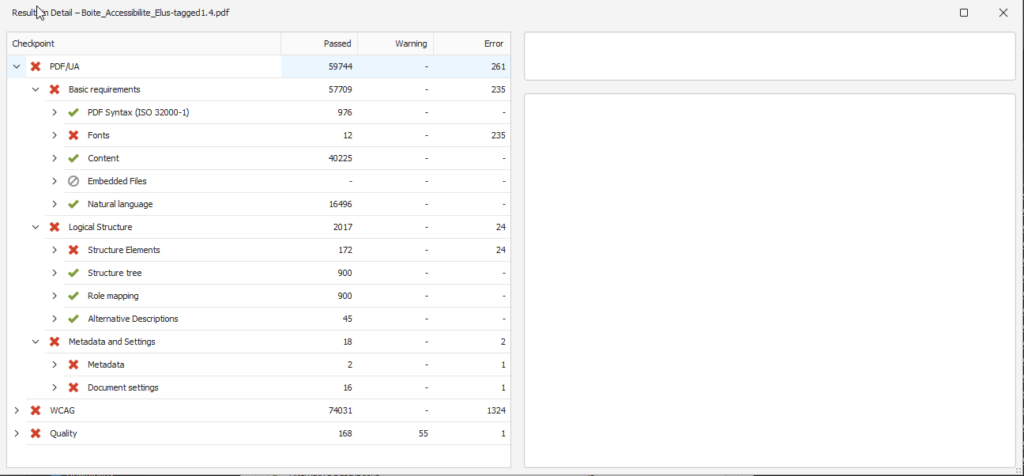
Results in detail
Font
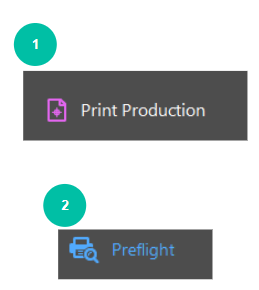
- In Print Production, click on Preflight.
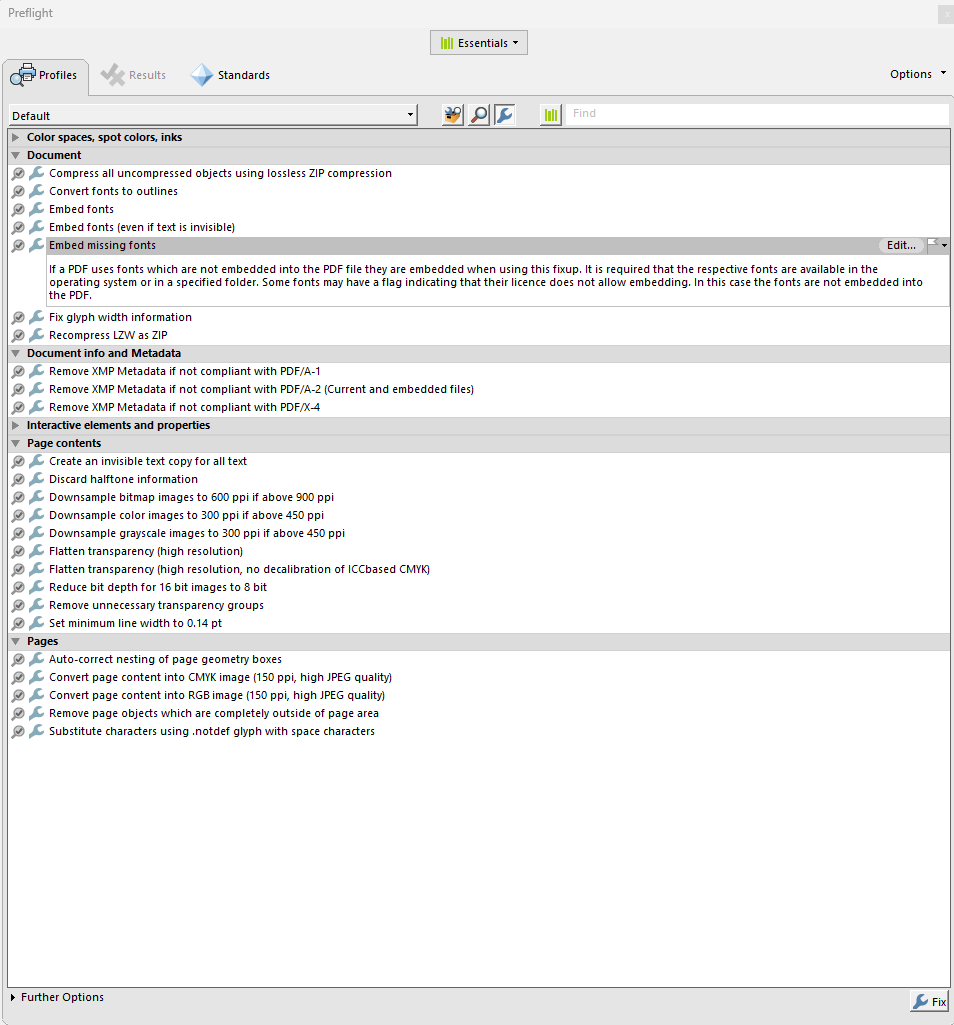
- Choose the PDF/A compliance or other checks that inspect font embedding.
- In the Preflight dialog, look under Fonts and run the Fix font issues check to identify any problems like missing fonts or fonts that aren’t embedded.
- The tool will show warnings or errors if there are missing or unembedded fonts in the document.
Fixes in Preflight
After running Preflight and identifying font issues, the following steps should be taken:
1. Embed Fonts
- In Adobe Acrobat Pro, go to File > Properties > Fonts.
- If any fonts are listed as “not embedded,” you can fix this by going to File > Save As > PDF and in the save options, select to embed all fonts before saving.
- Alternatively, in Preflight, you can run a fix that automatically embeds missing fonts.
2. Embed Missing Fonts
- From Preflight, select the Embed missing fonts option under the Fixups tab.
- This will ensure that any missing fonts are embedded into the PDF file.
3. Fix Font Problems
- In Preflight, use the Fix font issues option under Fixups.
- If the font is non-standard or incompatible, consider replacing the font with a more commonly supported one.
- You can manually replace fonts by using Edit PDF > Edit Text and changing the font to one that is available and properly embedded.
Note: Visual conformity should always be checked after correcting font issues.
Content
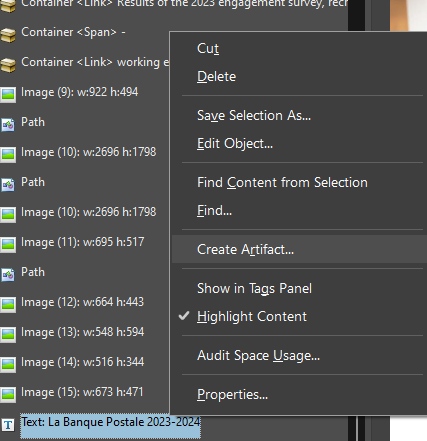
- Text/ Path objects not tagged
- Untagged elements can be found in the Content Panel and marked as artifact manually.
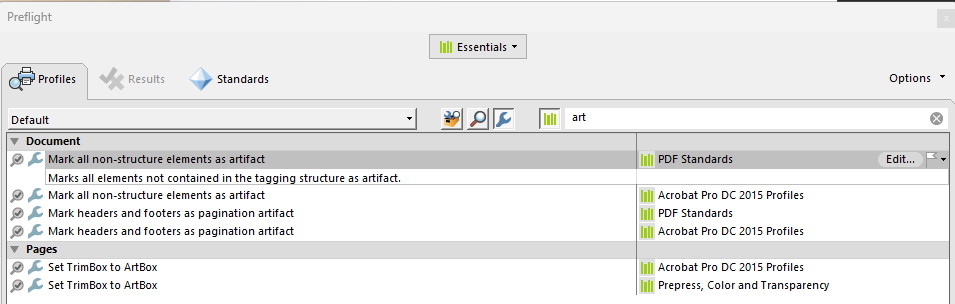
- In case of large docs/ untagged elements :
Print Production = Preflight
Fix: Mark all non-structured elements as artifact
Natural Language
- Document Language can be fixed in Document Properties (Ctrl + D) under Advanced section.
Structure Elements
- Heading = All Heading Levels should be tagged from H1 to H6.
- Notes = Note IDs should be added through Preflight.
- Annotations = Nesting of link annotations.
- The “Link” tag should be correct with the LINK OBJR.

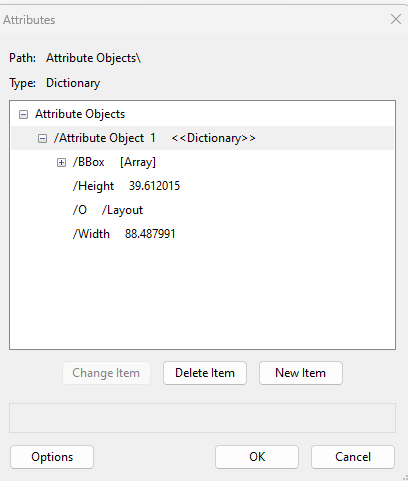
5. Figures
“Figure” tags should be sure to have the Bounding Boxes attribute.
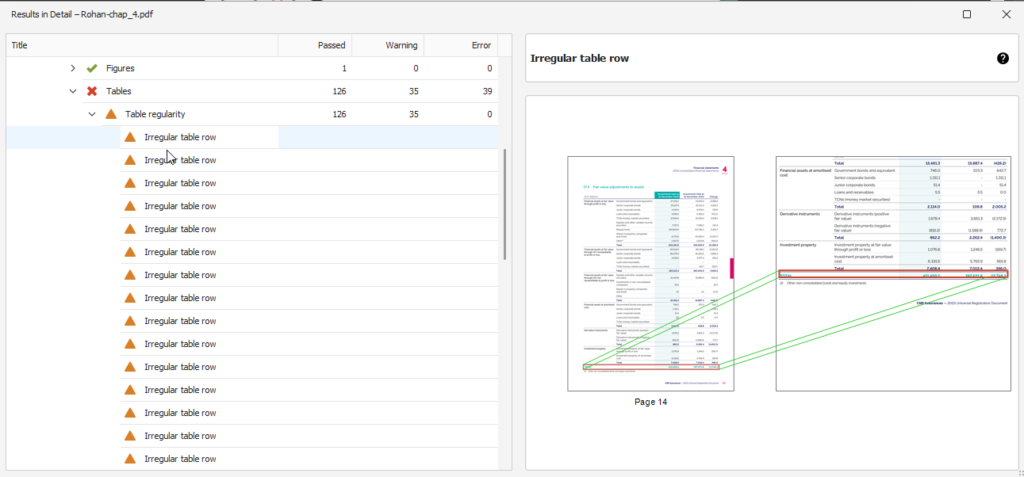
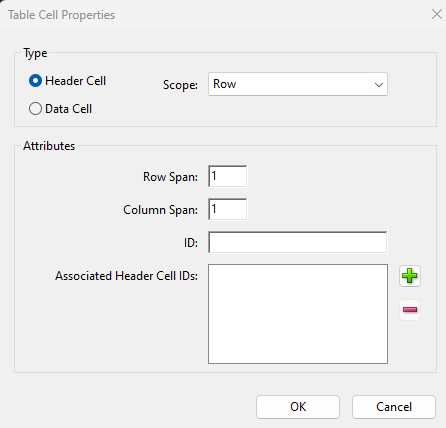
6. Tables
- Issues in Tables are as Table regularity and Table Header Cell assignment.
- Table regularity implies any problems regarding the table rows.
- Table Head assignment are the attributes added in the Scope: Column, Row and Both.
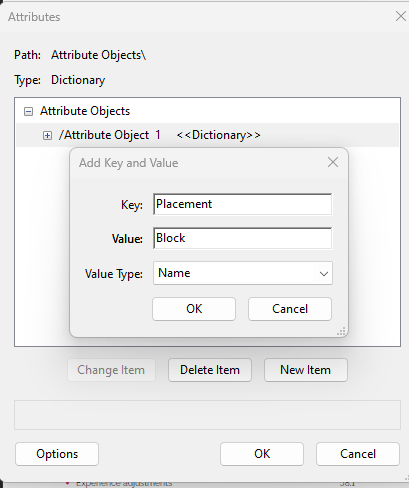
Structure Tree
- Tags like Figure, Note, Annot, links should include Placement and Block attributes.
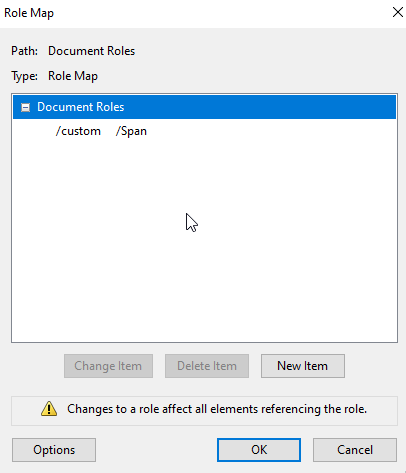
Role mapping
Non-standard structure type [X] is neither mapped to a standard structure type nor to another non-standard structure type.
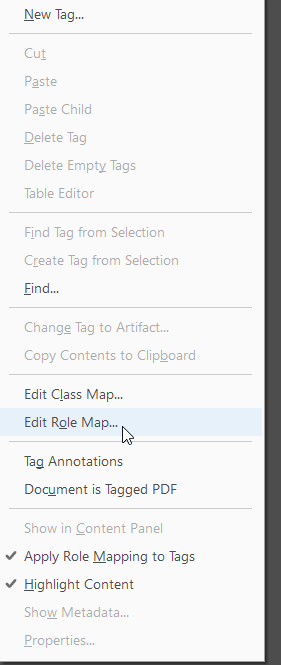
How to fix : In the Tags pane in Acrobat Pro, click the Options icon at the top left and select “Edit Role Map”. In the Role Map dialog, click the New Item button. In the Add Role dialog, map the non-standard structure type to an appropriate standard structure type.

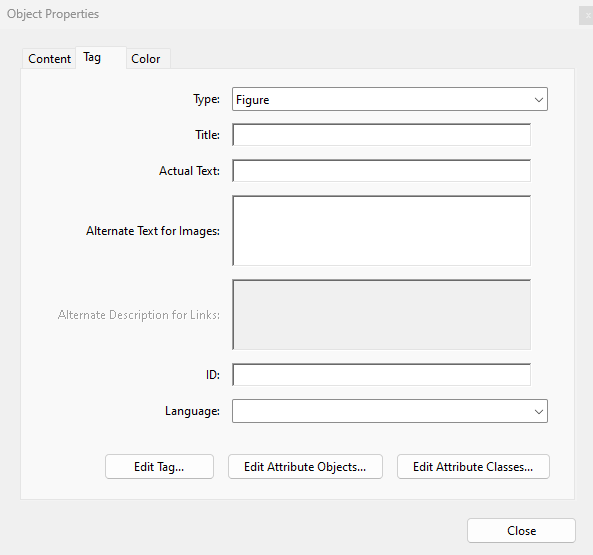
Alternative Description
Elements requiring an Alternate Description:
- Alternate Text for Images
- Alternate Description for Links
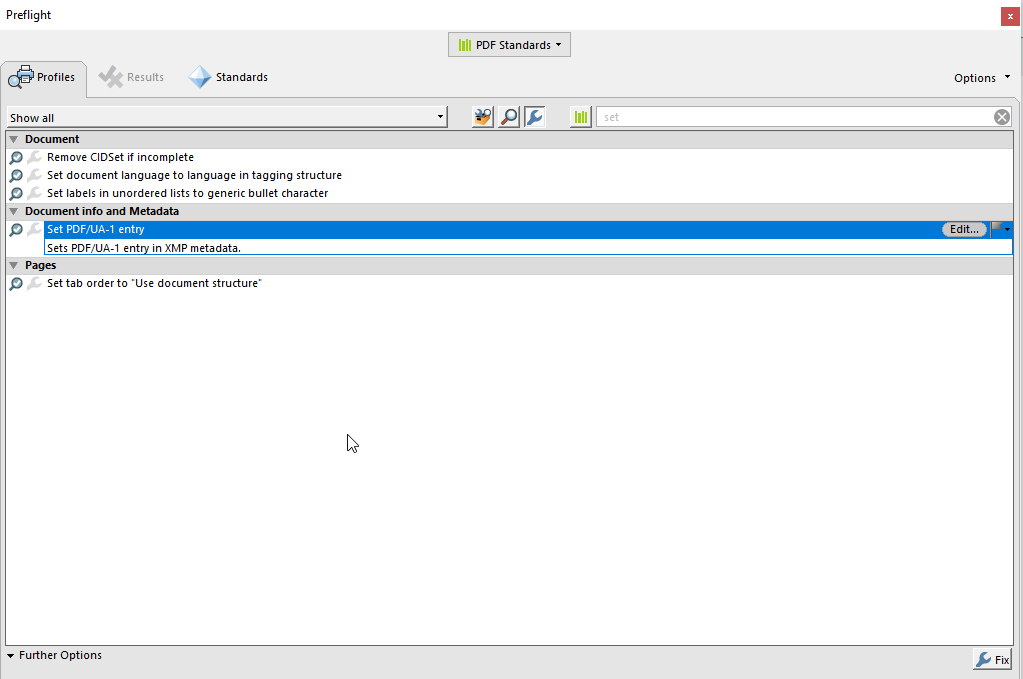
Metadata (PDF/UA identifier)
After manual tagging is applied to make a document accessible, maintaining visual conformity between the original and the tagged versions is essential. This practice ensures that the document not only meets accessibility standards but also remains user-friendly, retains its original design, and faithfully conveys its intended message.
1. Compare the Original and Tagged Versions:
- Side-by-Side Comparison: Open both the original and the tagged documents side by side. Visually inspect both versions to ensure that the overall layout, formatting, fonts, colors, and images appear identical. Pay close attention to headings, paragraphs, lists, tables, and any special formatting (e.g., bold, italics, or underlined text). This can be done by navigating through both documents using the Ctrl + Tab keyboard shorcuts.
- PDF Preview: Use the print preview to see how both documents appears. This can help identify any discrepancies that might not be as noticeable while working initially.
2. Examine Visual Elements:
- Images and Graphics: Ensure that all images, graphics, charts, and diagrams are positioned correctly and maintain their original size and proportions. Verify that alternative text (alt text) has been correctly applied without affecting the image placement.
- Tables: Inspect tables to confirm that cell alignment, borders, and shading are consistent with the original. Ensure that headers are properly tagged and visually distinct if they were in the original document.
3. Test Interactive Elements:
- Hyperlinks and Buttons: Check that all hyperlinks, buttons, and other interactive elements are visually and functionally consistent with the original document. They should be clearly visible and maintain the same formatting (e.g., color, underline).
- Form Fields: If the document contains form fields, ensure that they are correctly positioned, with the same size and style as in the original. Labels should be clear and aligned properly.
4. Use Accessibility Checker Tools:
- Run an Accessibility Check: Use Adobe Acrobat’s built-in accessibility checker or other PDF accessibility tools to scan the tagged document for any issues. While these tools primarily check for compliance, they can sometimes highlight areas where visual conformity may have been compromised during tagging.
- Screen Reader Test: Conduct a test using a screen reader to ensure that the document’s logical structure (as defined by the tags) corresponds with its visual appearance. This helps to verify that the document is both accessible and visually coherent.
1. Deleted Content
If content was deleted by mistake or needs to be restored from the original version of the document, you can add it back manually using Edit PDF and Insert Pages options. Here’s how to do it:
Insert Text or Object
- Open the original document (if you have access to it).
- In Adobe Acrobat Pro, go to Tools > Edit PDF.
- If text or objects were deleted from the tagged document, you can manually insert them. Use the Add Text option to type in missing content.
- If images or other objects were deleted, use the Add Image button to insert them from the original document.
- For form fields or tables that were deleted, you can recreate them in the Prepare Form tool, or manually add table cells and rows using Edit PDF.
2. Replacing Content with the Original Document
If you need to replace content that was modified or removed during the tagging process, you can use these methods to ensure the content from the original document is properly placed in the tagged version.
Copy and Paste Content from the Original Document
- Open the original document and the tagged version side by side.
- Select the content that needs to be replaced in the original document (text, images, tables, etc.).
- In Adobe Acrobat Pro, go to the tagged PDF and select the location where the content is missing or incorrect.
- Copy the content from the original document and paste it into the tagged version.
- After pasting, ensure that the content is properly tagged and the visual appearance is aligned.
3. Bring Forward (or Send Backward)
Sometimes, objects might be layered behind other elements, leading to visual confusion (e.g., a text box might be hidden behind an image). The Bring Forward or Send Backward options allow you to adjust the layering order of objects within the PDF.
How to use Bring Forward/Send Backward:
- In Edit PDF mode, select the object (image, text box, etc.) that is not displaying properly.
- Right-click on the object and choose either Bring Forward or Send Backward to adjust the layering.
- Use Bring Forward to move an object in front of others, or Send Backward to move it behind other elements if necessary. This can help to avoid visual errors like overlapping elements or hidden content.
4. Check for Hidden Objects
Sometimes, objects might be incorrectly hidden behind others, which can cause visual errors. Hidden objects may be invisible but still interfere with the document’s layout and accessibility.
How to check and fix hidden objects:
- In Edit PDF, check the Layers panel to see if any objects are hidden or incorrectly layered.
- Use Show/Hide Layers to make sure no hidden objects are disrupting the document’s layout.
- You can also use Preflight to check for any hidden objects or elements that might be causing issues and ensure they are properly tagged.
Note : After correcting visual errors in a PDF, it's essential to perform retagging and rechecking to ensure that the document remains fully accessible and properly structured. This includes reapplying tags to any newly added or modified content and verifying the document's accessibility to ensure that all elements are correctly tagged and aligned.
Bookmarks provide a quick and easy way for users to navigate through the document, especially in lengthy PDFs. By clicking on a bookmark, users can instantly jump to specific sections, chapters, or pages without having to scroll through the entire document. For users with disabilities, particularly those using screen readers, bookmarks offer a structured way to move through the document.
In a tagged PDF, bookmarks often align with the tagged elements like headings (H1, H2, etc.). This consistency ensures that the document's structure is clear and navigable, both visually and through assistive technologies.
Steps to Add Bookmarks Using Automatic Bookmark Generation:
- Open the PDF in Adobe Acrobat:
- Launch Adobe Acrobat and open the tagged PDF document.
- Check the Document's Tag Structure:
- Ensure that your PDF has a proper tagging structure with headings (e.g., Heading 2, Heading 3, etc.). The automatic bookmark generation feature relies on these tags to create bookmarks.
- You can view the tag structure by going to View
>Show/Hide>Navigation Panes>Tags.
- Open the Bookmarks Panel:
- On the left side of the Acrobat window, click on the Bookmarks icon to open the Bookmarks panel.
- Generate Bookmarks Automatically:
- In the Bookmarks panel, click on the Options menu (three horizontal lines) at the top right of the panel.
- From the dropdown menu, select New Bookmarks from Structure.
- Select the Tags for Bookmarking:
- A dialog box will appear, showing the structure of your document.
- Expand the structure to see all the available tags, such as Heading 2, Heading 3, etc.
- Select the tags that you want to generate bookmarks for. Typically, you would select headings to create bookmarks for chapters and sections.
- Generate and Review Bookmarks:
- After selecting the tags, click OK. Acrobat will automatically create bookmarks based on the selected tags.
- Review the generated bookmarks in the Bookmarks panel to ensure they accurately reflect the structure of your document.
- Organize and Edit Bookmarks:
- If necessary, you can manually adjust the bookmarks by dragging them into the correct order, renaming them, or creating sub-bookmarks.
- This step ensures that the bookmarks are user-friendly and correctly represent the document’s structure.
- Test the Bookmarks:
- Click each bookmark in the panel to ensure it navigates to the correct section of the document. This helps verify that the bookmarks are functioning correctly and linked to the right locations.
- Save the Document:
- Once you’re satisfied with the bookmarks, save your document by going to File > Save or File > Save As.
Steps to manually add bookmarks
- Open the Bookmarks Panel
- On the left-hand side, click the Bookmarks icon (it looks like a ribbon). If you don’t see the Bookmarks panel, go to View > Show/Hide > Navigation Panes > Bookmarks.
- Add a Bookmark
- Navigate to the page or section you want to bookmark.
- Select the Bookmark panel on the left.
- Click the New Bookmark icon (a small ribbon with a star) at the top of the panel or right-click inside the panel and choose Add Bookmark and rename it if needed.
- Link the Bookmark to the Correct Page
- Once you've added and named the bookmark, ensure it is linked to the correct page or location. By default, the bookmark will be linked to the page you're currently viewing when you create it.
- You can also drag and drop bookmarks to reorder them or nest them under other bookmarks to create a hierarchy.
- Save the Document
- After adding all your bookmarks, save the document to retain the changes.
On this page
A screen reader test is crucial to ensure that a document is fully accessible and functions correctly for users relying on screen readers.
Steps for Conducting a Screen Reader Test with NVDA:
- Install and Open NVDA:
- Download and install NVDA from NVDA’s website.
- Open NVDA to start screen reading.
- Open the PDF Document:
- Launch the PDF in Adobe Acrobat or another compatible reader.
- Check Headings and Structure:
- Use H to navigate through headings and ensure they’re correctly tagged and ordered.
- Test Lists and Content Flow:
- Use N for list items and arrow keys for reading order. Ensure NVDA reads content logically.
- Verify Links and Form Fields:
- Navigate to links and form fields. Check that they are read correctly and are functional.
- Check Alt Text for Images:
- Move to images and confirm NVDA reads the alt text accurately.
- Review and Adjust:
- Note any issues and make necessary adjustments. Re-test to ensure fixes are effective for example in cases of stuck words.
- Here are some useful NVDA shortcuts for navigating PDFs efficiently:
| Action | Shortcut |
|---|---|
| Basic Navigation | |
| Quit NVDA | Insert + Q |
| Open NVDA menu | Insert + N |
| Read the title of the window | Insert + T |
| Read the current line | Insert + Arrow Up |
| Read the current paragraph | Insert + Arrow Down |
| Read the current word | Insert + Arrow Left |
| Read the next word | Insert + Arrow Right |
| Navigation by Elements | |
| Move to the next heading | H |
| Move to the previous heading | Shift + H |
| Move to the next link | K |
| Move to the previous link | Shift + K |
| Move to the next table | T |
| Move to the previous table | Shift + T |
| Move to the next list | L |
| Move to the previous list | Shift + L |
| Move to the next button | B |
| Move to the previous button | Shift + B |
| Reviewing Content | |
| Activate the current item | Insert + Space |
| Read the current line or object | Insert + Up Arrow |
| Start continuous reading | Insert + Down Arrow |
| Read previous character | Insert + Left Arrow |
| Read next character | Insert + Right Arrow |
| Reading Control | |
| Start reading from the top of the document | NVDA + Ctrl + Up Arrow |
| Start reading from the bottom of the document | NVDA + Ctrl + Down Arrow |
| Start or stop speech output | NVDA + S |
| Start reading continuously | NVDA + A |
| Setting and Adjusting Speech | |
| Open speech settings dialog | Insert + V |
| Toggle speech settings | NVDA + Shift + S |
| Miscellaneous | |
| Open NVDA settings dialog | Insert + F12 |
| Open bug report dialog | Ctrl + Alt + N |
| Switch to Desktop and focus | Ctrl + Alt + D |
| Open NVDA help system for current context | Insert + F1 |
| Open help file | NVDA + F12 |